Customize Your Shoes & Sneakers!
Are you significantly less than impressed with your options at your selected shoe store? You don’t have to stay for average shoes or arrive in the same shoes as another person. Instead, customize your shoes showing off your creative side or match your preferred outfit perfectly, to stand out in a sea of boring sneakers.
Ways to Customize Your Shoes
creative-custom-shoes
Forget paying a lot of money to order custom-made shoes. Instead, make your own easily at home! You have many choices to customize your sneakers on your own. A little creative imagination goes quite a distance, and each of these methods produces several results, depending about how you apply the customization.
Check out these ways to customize your shoe dye:
Spray paint: Is it possible to spray paint shoes?
Absolutely! Spray paint is an instant way to repay the shoe completely. The paint stays on the surface of the shoe, rather than soaking in to the material. With so many colors and types of spray paint available, this useful trick for customizing your shoes gives you a significant amount of versatility.
Dye: IS IT POSSIBLE TO Dye Shoes?
The answer is “Yes!” The dye actually soaks into the material to change the color of your shoes. Dying shoes effectively is paramount to getting the appearance you want.
Custom Laces
custom-elastic-shoelaces
Another simple way to update your footwear is to use custom shoelaces for sneakers. Elastic shoelaces not only offer you versatile color options, nevertheless they also make your shoes convenient to wear without tying them each time.
How to Spray Paint Shoes
One option for boring shoe solutions is to spray paint your kicks. Once you spray paint shoes, you’re adding a layer of color on top of the existing shoe. This means you can transform the color to whatever you want. You can change a dark shoe a light color, or vice-versa.
Spray painting is most effective to change the colour of leather and synthetic shoes. Select a kind of spray paint that works on the precise kind of material your shoe is manufactured out of. Many spray paint brands make special paint that works on plastic, leather, vinyl and similar materials. Floral spray paint is another option that works well, because it’s flexible and is also less likely to crack or wrinkle as time passes as the shoe material moves.
If you spray paint shoes, you will need the next materials:
Spray paint suitable for the sort of material applied to your shoes
Deglazer, leather preparer or acetone
Rags or cotton balls
Painter’s tape
Drop cloth
Rubber gloves
Newspaper
Begin by covering your projects surface with a drop cloth or plastic sheet. Choose a well-ventilated area, as spray paint tends to have strong fumes. Once your projects area is ready, you can complete the next steps:
Prep the shoes by by using a rag or cotton balls to apply a deglazer, leather preparer or acetone. The goal is to clean from the shoes and remove any coating that may hinder the paint sticking with the surface. Allow shoes dry.
shoe-spraypainting-tips
Tape off any areas you don’t want spray painted. For instance, you don’t likely want the edges of the soles or the heels to get painted. You might also tape off certain design elements on the shoe, like a bow on pumps or the symbol over a name-brand couple of sneakers. Take into account that the paint can seep under loose tape edges. Apply the tape cleanly and securely to get crisp lines on your finished product.
Stuff newspaper inside the shoe to hold the shape also to avoid the paint from seeping inside and making a mess. This also keeps the insoles from getting covered in paint as you spray the shoes.
Shake the spray paint well before starting. Hold the can a few inches from the shoes. Spray the shoes with a light, even coat using long, sweeping motions. Thin coats provide better coverage, prevent dripping and decrease the likelihood of the paint eventually cracking.
Let each coat of spray paint dry completely. Apply additional coats as had a need to get the full coverage and color vibrancy you want.
Allow paint dry for an hour following the final coat before removing the tape. Allow paint cure another a day.
Spray over a sealant made for the kind of material found in your shoes. Select from a matte or a glossy sealant, with regards to the look you want. Let the sealant cure for at least a day before wearing the shoes.
Tricks for Spray Painting Shoes
Spray painting shoes is similar to spray painting other items, but there are many shoe-specific what to retain in mind. Use these pointers to get the look you want on your spray-painted shoes:
Plan your design: Know very well what colors you intend to work with and where they’ll go before you begin working.
custom-spraypainted-shoes
Get creative: You don’t have to spray paint the whole shoe the same color. You might only spray paint the toe to make a toe cap look, or you may execute a striped effect with your spray painting. Take into account that if you wish to use tape over an area once you paint it, you should wait until the paint fully cures before applying the tape. If you put tape over a painted section too soon, it will likely pull off the paint when you remove the tape.
Start light: In case your spray-painted design involves more than one color, apply the lightest color first. Allowing you correct mistakes more easily. Dark colors are more challenging to cover up if you accidentally spray an area you didn’t want to spray.
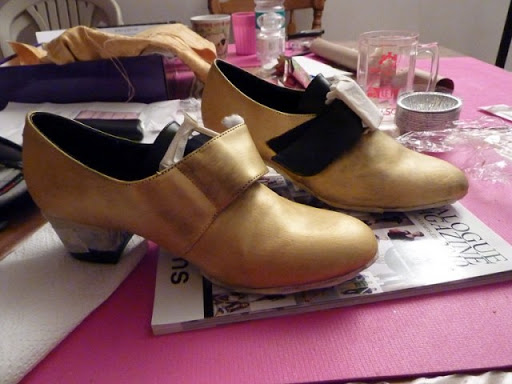
Create a base coat for metallic paint: For your metallic spray paint, start with a base coat in an identical color minus the metallic effect. The bottom coat gives you better coverage for a good color. Apply the metallic version over the standard paint to provide the shoes the finished metallic effect.
Don’t skimp on prep: The prep phase is the most important area of the painting process. Prepping the shoes ensures the paint has a smooth, clean surface, so it can adhere completely.
Scrape away excess: If a few of your spray paint gets on the heel, sole or other areas you don’t want it, use a razor blade to gently scrape off the excess paint.
How to Dye Shoes
When deciding how to color shoes, dyeing is another option. Dye changes the colour of the shoe fabric, but it doesn’t cover it up. Quite simply, it’s a transparent layer of color. This implies any blemishes on the shoe still show after dyeing. They may be less noticeable with a dark layer, nevertheless they may still be visible.
While you dye shoes, you always go darker. Also retain in mind that, since it’s a transparent coloring, the existing color still remains. If you dye your tan shoes a green color, the tan color remains, so the results might not be quite what you anticipate. Understand that dye is permanent, so once you dye the shoes, you can’t take it back.
Dyeing Canvas
dyeing-canvas-shoes-tips
White canvas supplies the perfect canvas for dye. The white color means any color of dye is effective. Other colors of canvas also work, but retain in mind the initial color may show through. Canvas also absorbs dye well, taking on a rich color.
Check the packaging of your selected dye to find out exactly what you may need. Generally, the materials had a need to dye canvas shoes include:
Liquid dye created for fabric
Canvas sneakers
Large measuring container
Rubber gloves
Waterproof tape
Metal spoon
Stainless steel pot
Stainless tongs
Paper towels
Plastic table covering
Sponge brushes
Because dye is permanent, protecting your work area is vital – if you don’t want a tie-dyed countertop! Cover your projects surface with plastic sheeting or a plastic tablecloth before you begin. Using metal pots, glass measuring containers and metal utensils keeps those items from dealing with any unwanted color.
Before prepping your dye, cover any areas you don’t want to dye using waterproof tape. Waterproof medical tape is effective. Apply the tape carefully along the rubber edging at the bottom of the shoe. Take away the shoelace. If you plan to keep the original laces, you can either leave them the original color or place them in the dye to complement the new shoe color.
different-ways-to-dye-your-shoes
You are able to dye your canvas shoes in one of two ways: submerged in a dye bath or dye-painted with sponge brushes. The dye bath method is faster, because you dunk the complete shoe in the dye. The dye-painting method gives you more control over the dye application.
To work with the dye bath method, follow these steps:
Fill a large stainless pot with warm water. You need enough water to totally submerge the shoes with extra room for the shoes to go. Add the necessary amount of your dye. Make reference to the dye instructions to look for the proper water-to-dye ratio based on the amount of water you use.
Soak the shoes in warm water. Place the shoes in the dye bath using tongs.
Heat the pot to help make the dye bath simmer. Stir the dye bath constantly in different directions. Leave the shoes in long enough to attain the desired vibrancy. This may vary from ten minutes to one hour, depending on look you want.
Rinse the shoes, starting with hot water. Gradually lower the temperature of the water. Continue rinsing until the water running from the shoes is clear.
Wash the shoes in a mixture of hot water and mild detergent. Rinse the shoes thoroughly to remove every one of the detergent.
Dry your newly dyed shoes in sunlight.
If you like the painting method, follow these steps:
Heat 4 to 6 6 cups of water to boiling.
Place paper towels inside the shoes so the dye doesn’t soak into areas you want to keep plain.
Shake the dye. While wearing gloves, pour the correct amount of dye into a large glass measuring cup that holds 6 cups or even more. Add 4 cups of the warm water. Stir to incorporate the dye and water. Test the color by dipping a paper towel in to the dye. Add more dye if you wish a darker color. Add more water if you need it lighter.
Dip a sponge brush into the prepared dye. Paint the dye onto the shoes. Continue dipping and painting to get the coverage and intensity you want.
Allow shoes rest for approximately 20 to thirty minutes. Rinse the shoes in cold water. Allow shoes dry overnight. Because they dry, they tend to look lighter. Apply more dye if you wish a darker color. Repeat the resting, rinsing and drying phase.
You can also get creative with the way you dye your shoes. Here are some ideas:
Dip only the toe or the heel in the dye.
Dye leading half of the shoe in one color and the back half in another color.
custom-dyed-shoes-tips
Create an ombre effect by soaking the complete shoe in the dye bath for a short while and gradually pulling out the shoes a little at the same time. The sections that stay in longer get a darker look.
Utilize the dye-painting solution to apply different colors to the same shoe in virtually any number of designs or patterns.
Dyeing Leather
You can even dye leather shoes by using a brush-on painting method. Use dye made specifically for the sort of leather on your shoes. Synthetic leather typically doesn’t take dye well, even if the dye says it’s designed for synthetic leather, so proceed with caution with these kind of shoes. Work within an area with good ventilation, as some of the chemicals and dyes applied to leather have harsh fumes.
You’ll need the following supplies to tackle the project:
Leather preparer and deglazer
Leather dye
Leather conditioner
Neutral polish
Plastic cover for your projects surface
Rubber gloves
Old, clean rags
Masking tape
Horsehair brush
Leather dye includes different base options, including water, oil and alcohol bases. Alcohol-based dyes tend to dry quickly and with vivid results. If you choose an alcohol-based product, make certain to use proper ventilation.
Leather shoes typically have coatings about them that can prevent the dye from coloring the shoes completely. Preparing the shoes is an important step to eliminate that coating and get a regular color. Follow these steps to prep and dye the leather shoes:
Apply the leather preparer and deglazer to eliminate any coating and debris. Rub the preparer on the shoe with a clean cloth. Since you apply the preparer, the shoe starts getting lighter and takes on a dull appearance. Follow the merchandise directions, giving the shoes time and energy to dry after applying the preparer.
Tape off any areas that you don’t want to dye. Make sure the tape adheres well with a crisp, straight line.
Brush the dye onto the shoes with a small, high-quality paintbrush. Apply the dye in a single direction using long strokes for the best results. Follow the stitch lines to minimize the consequences of the brush strokes.
Let each thin layer dry completely before applying another. Apply as many layers as essential to get the colour intensity that you desire.
Allow shoes dry for 24 to 48 hours. Apply leather conditioner to include moisture back into the leather, as the dyes and chemicals have a tendency to dry the material.
Apply a neutral polish within the leather. Use clean cloths and move the cloth around frequently, as some dye will come off as you apply the polish. Buff the shoes by using a horsehair brush.
tips-for-dyeing-leather-shoes